Thursday, November 24, 2011

Winter is upon us (maybe)


December 5, 2011

Winter seems to be upon us here in Northern Virginia. I must say, this place has the strangest weather of all the places I have lived. Last week, it was sunny and 65 degrees when we went to the gym at 7 AM, and then at 11 AM, the clouds had moved in, and it began to sleet.
Things are improving, as the daytime temperatures have stayed consistently lower for the past few days. I just want it to get cold, and STAY cold! The weather needs to make up it's mind!

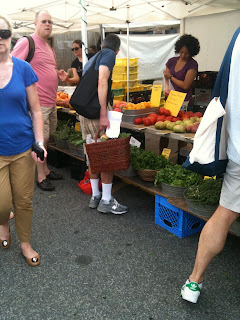
With the cold weather here, and the choices at the farmer's market becoming more slim, I find it fitting to post our new favorite winter stew recipe. And what is better with stew than homemade cornbread.

I make mine in the "Southern" fashion in a well-seasoned, never "washed" cast iron pan. My Mom usually uses White Lily self-rising cornmeal, which contains the baking soda, baking powder, and about 20% wheat flour/80% whole grain cornmeal. There is never, never any sugar added, and the use of buttermilk is strongly recommended.


Since I cannot buy White Lily products in the DC metro area, I have very happily decided to make a 100% cornmeal loaf using chef John Martin Taylor's cornbread recipe. His ingredients and technique are exactly like my Mother's, with the exception of the flour/cornmeal. I'm using stone-ground, whole-grain North Carolina grown yellow cornmeal that I found at the Ft. Myer Commissary, of all places!

Now for the delicious stew recipe. This stew is packed full of fiber, protein and deliciousness!
Please note that ANY of the vegetables mentioned can be substituted, as I know some things are not always available at the farmer's market, or perhaps some
of you out there have food phobias.


Winter Market Goulash

Ingredients:

1 tablespoon all-purpose flour
1 tablespoon butter or bacon grease
1 pound leftover bison roast, shredded. We like to use a 2 pound slow-roasted bison shoulder roast. We use half of it for this stew, and half of it for chili. Ground beef is OK too, just be sure to cook it before adding it to the stew.
1- 15 oz can of stewed tomatoes
1 medium onion, diced
2 cloves garlic, minced
1 "fist-sized" celery root, peeled and chopped into 1 inch pieces
4-5 carrots, peeled and chopped into 1 inch pieces
1 pound sweet potatoes, peeled and chopped into 1 inch pieces
2-3 medium sized beets, peeled and chopped into 1 inch pieces
1 tablespoon olive oil
1 tablespoon ground cumin
1 tablespoon finely chopped fresh rosemary
1/2 teaspoon thyme, fresh or dried
1/2 teaspoon of smoked paprika
pinch of brown sugar
1/2 teaspoon ground black pepper
1/2 teaspoon kosher salt (or more to taste)
2 cups chicken or beef stock, homemade is best :)

Method:
Preheat oven to 350 F.
Put all of the chopped root veggies (carrot, celery root, sweet potato and beets) onto a sheet pan and toss with 1 tablespoon olive oil. Spread them out for even cooking. Let bake for 30-45 minutes, or until fork-tender.
In a heavy stew pot or cast iron dutch oven on your stovetop-
Cook the flour and fat together on medium heat to make a roux. The roux needs to be between a dark blonde to caramel color before continuing with the recipe. Once the roux has this color--
Add the diced onions and cook on medium-high heat until softened.
Add the tomatoes and chopped garlic, and cook for 3-5 minutes on medium heat.
Add your cooked bison or beef, the fork-tender root vegetables, spices, and salt and pepper.
If the mixture is too thick, add chicken or beef stock for desired consistency.
Let simmer on low heat for 10-15 minutes.

Serve with hot cornbread and butter, and a glass of your favorite red wine. I like a Malbec with this dish. As for a beer pairing, Doug recommends the Dogfish Head Indian Brown Ale.


I am proud to say that most everything for this dish (herbs, veggies, bison, butter, chicken stock) was sourced at the Courthouse Farmer's Market last Saturday. I made the chicken stock a few weeks ago from a locally-raised hen, and I put it in the freezer. The only ingredients NOT sourced locally were the tomatoes (I canned those myself in South Carolina in August), spices, flour, salt and pepper, and olive oil.

This recipe shows that anyone can find a local farmer's market, even at the beginning of winter, and find the ingredients to make something delicious.
The thing to keep in mind is to buy what looks good and then figure out later what to do with it.
Make seasonal dishes with seasonal ingredients.
It's an adventure and a challenge!

Monday, October 10, 2011

Balls O' Bunny


October 10, 2011

It's October, and that means deer season in the South.
Yet, many hunters do not know that rabbit season is also coming up soon.
In the Commonwealth of Virginia, rabbit season runs from November 5 through February 29 this year. And as a bonus, you get to bag 6 each day!

If you have never had rabbit, you are missing out. Rabbits are not just cute little bunnies that bring you chocolate eggs on Easter (that folklore is kind of weird by the way....giant rabbits leaving candy for children...in egg form....seems un-natural...and yet somehow Santa is much less creepy.....anyways, I digress....)

We have found a wonderful source of "domestic" "free-range" rabbit here in Northern Virginia from EcoFriendly Foods, producers of pastured poultry, pork, and game meats.
They are at our local farmers market every Saturday.

You can get rabbit parts, for dusting in seasoned flour and deep frying, like I grew up eating, or you can try their ever-weird "ground rabbit", at a mere $8.50 per pound.
We decided to give it a try...

Ground rabbit is not as weird as you would think. In Great Britain, ground rabbit is a fairly normal ingredient for meatloaf and meatballs.
Buying "game meats" like venison, rabbit, or even pheasant there means buying a wild animal that has been shot by a hunter.
This type of enterprise in the United States is illegal. There is hope though, as you can buy "farm raised" varieties to quench your craving for venison or rabbit here Stateside.
Or just get it from your Greek neighbor, Dinos!


This recipe was inspired by our Greek friend, backyard rabbit-farmer, and neighbor in Gainesville, GA: Dinos.
I hope that he will try this recipe himself and drink some ouzo in our honor!


Bunny Meatballs: Greek Style

Pre-heat your oven to 400 F and put some non-stick spray on your muffin tin.
We like to bake our meatballs in a muffin tin. Helps to keep them "round" and frees up the cooktop!

Ingredients:
1 pound ground rabbit. It's surprisingly lean, since most of the fat is next to the skin
1 egg (chicken, not chocolate)
1/2 teaspoon ground black pepper
1/2 teaspoon salt
juice of 1/2 of a lemon
1 teaspoon dried thyme
1 teaspoon dried sage
10 juniper berries*, crushed into a powder
1 teaspoon dried or fresh rosemary, chopped fine
2 cloves garlic, minced
1/2 of a medium sized onion, finely minced
1/4 cup of Old Fashioned Oatmeal, pulverize into a powder OR just use bread crumbs

Method:
In your food processor, chop into little bits the Oatmeal, garlic, onion, lemon, salt and pepper.
Combine all of the spices (including juniper berries) into a coffee grinder and pulverize them too.
Put the contents of your food processor and coffee grinder into a mixing bowl, and then add the ground rabbit and egg. Mix together gently.
Pinch your mixture into ball-shapes, however big or small you like them. Mine are about the size of a chicken egg each.....and they fit nicely into the muffin molds.
Bake for 20 minutes. Let the meatballs cool for 3-5 minutes before serving.
I find that lifting them out of the muffin mold with a spoon works best, especially if they stick a little.

Yogurt Sauce: Good on everything

Ingredients
1/4 cup Greek Yogurt
1 clove garlic, finely minced
1 tablespoon dried dill
Juice of 1/2 a lemon
salt and pepper to taste
drizzle of olive oil
Mix it all together and enjoy!

Make yourself a salad with romaine, crumbled feta, yogurt sauce, add roasted potatoes and bunny balls and you are good to go! MMMM!

Just remember: cute little bunnies are not just for Easter anymore....they're the Other Other OTHER white meat!


*P.S. THIS SPICE COMES WITH A WARNING. DON'T GO CRAZY WITH THE JUNIPER, OK?
Random food trivia: Juniper berries are also an important ingredient in JAGERMEISTER.

Sunday, October 9, 2011

Back to the Lowcountry

September 24, 2011

Chillin' with Radar in Goose Creek

The wedding of Rebecca Alderman and Kurt Infinger
Cypress Gardens, Moncks Corner, SC

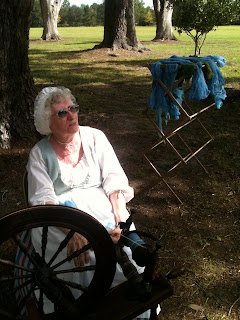
Spinning wool dyed with indigo at the Charles Pinckney National Historic Site

Cypress Gardens. Moncks Corner, SC
Charleston Tea Plantation, tea bushes
The Angel Oak. John's Island, SC
Yep, that's me, hugging a 300+ year old tree!
Thanks Dave for this picture!


Sigh. I miss South Carolina right now. I'm sure you have read about the significant change in my lifestyle, with concrete all around my feet, and roughly 2 square feet dedicated for gardening inside my apartment.....so it comes as no surprise that going to Charleston for a weekend caused a certain amount of homesickness.

It was a great weekend, homesick or not. I got to see many friends from the Animal Medical Clinic of Goose Creek, eat wedding cake, and even Miss Jerri from Hilton Head came up to Charleston to hang out with me!

I want to thank Dr. Janette Blackwood of Goose Creek (JB!), her husband Dave Zook, and their dog Radar for being excellent hosts. I had a great time with them exploring Charleston and the surrounding 'burbs that I did not know were in existence. They also made the pilgrimages with me to long-time favorite spots like Bojangles, Sesame Burger, and the Charleston Tea Plantation.

Janette also was gracious enough to let me hold her kitchen hostage and make home-made hummus for the covered dish wedding reception.

Below I have listed my recipe for hummus, a slight derivation from Alton Brown's recipe, for all to try!

Simple Hummus for the Masses

This is a great recipe for a party, or to keep in the fridge all week for your husband to snack on.
Serves 6-8
Ingredients:
3 cans of chickpeas (garbanzo beans), drained and rinsed
3 cloves of fresh garlic
1/4 cup of tahini paste (ground sesame paste...you can get it at Publix)
1 teaspoon ground black pepper
1/2 teaspoon of table salt or sea salt
juice of 1 large lemon
1/4 cup extra virgin olive oil

Method:
This is best done with a food processor fitted with a steel blade. You can do it by hand with a potato masher and some elbow grease, but it takes a while and your arms will hurt at the end.
Put the garlic cloves in the food processor, pulse until chopped fine.
Then add the 3 cans of drained chickpeas, the tahini, the salt, pepper and lemon, and blend until smooth.
If the mixture looks a little dry, add 2-4 tablespoons of water, and pulse together.
Lastly, turn on the food processor, and drizzle in the olive oil as the blade is spinning.
Voila! You have authentic hummus to feed an army.
Turn out your hummus into a bowl or tupperware, serve with pita bread, chips, and/or veggies.

For an extra authentic flare, pour a tablespoon of extra virgin olive oil on top of the hummus, to make a little "lake", and then sprinkle on some sumac. Enjoy!

Tuesday, August 30, 2011

Apartment "gardening"


August 30, 2011

We are nice and settled into our tiny apartment in Rosslyn, Virginia, despite the earthquake and hurricane attempting to disrupt us. It's been awesome so far....but there's one thing missing.

A garden! I am going into major garden withdrawal, since I use so many fresh herbs in my cooking. In Beaufort, I was used to walking into my yard and picking whatever I needed. During most of the year, I had flat-leaf parsley, basil, chives, mint, rosemary, oregano, and thyme.


Before my move, I decided to give indoor "gardening" a try. I took two baskets with plastic liners, and filled them with "mature" basil plants, chives, and parsley. During the first two days of travel in my car, and then into the apartment, the parsley looked like it was not going to make it. I cut back some of it's "dying" parts, and now, it's making a slow comeback. I've had to put the potted herbs on my kitchen table, under one of our large bay windows. It gets a lot of morning sun, but I fear it will not be enough to sustain the sun-loving basil through the shorter days of the year.

My new garden

I have also started growing sprouts again. I bought this large "sprouting jar" for $2 at a health food store a few years back, and we have grown 3 batches of alfalfa sprouts in the last two weeks. Sprouts seem to be the way to go for "apartment gardening" since they take up very little space, require no soil, and will grow in almost anything. My "sprouting jar" is really a large Ball jar with a stainless steel mesh top that keeps insects out and allows for good air flow. You could do the same with a clean leftover marinara jar, a cheesecloth or thin towel and a rubber band to hold it on.

Here's what I do: At the health food store in Beaufort, "It's Only Natural," I bought organic alfalfa seeds.
In my "sprouting jar", I add:
1 cup of lukewarm water
1 teaspoon of organic alfalfa seeds
Set the jar on your counter top and let the seeds soak for 8-12 hours (overnight)
After 8-12 hours, pour off the water from the seeds (the steel mesh also makes this easy, it keeps your seeds IN the jar when you dump the water out)
Put your jar where there is sunlight, like a windowsill.
Watch them grow!

For alfalfa seeds, the process takes about 72 hours.
Remember to rinse the sprouts once daily with lukewarm water, just swish it around to "moisten" the growing spouts, then dump the water out.
When you are ready to eat them, rinse them out in cool water into a bowl, and let the seed "husks" float to the top, and skim them off. You can skip this step and eat them, they are just a little tough.

You can sprout certain things in the dark, but, without sunlight, there will be no nutritious chlorophyll production in the wee little sprout leaves.

Alfalfa sprouts are a good source of Vitamin A, protein, fiber, Vitamin K, and Vitamin C.

Now I have all these sprouts, what can I do with them? Add them to:
- Veggie/fruit juices - Smoothies - Stir-fry
- Salads - Sandwiches - Wraps - Coleslaw
- Sushi - Pizza topping - Eat raw

What else can I do with sprouts? What else can I grow in my jar?
Check out the International Sprout Grower's Association website for ideas.

Tofu Vegetable Stir-Fry with alfalfa sprouts

Ingredients:
1 package extra firm tofu
1 tablespoon fresh ginger, grated or finely minced
1 garlic clove, finely minced
1 teaspoon tumeric

1 tablespoon Garam Masala spice mix
1 cup of low-sodium chicken or vegetarian broth
1 teaspoon low-sodium soy sauce
1 tablespoon rice vinegar
handful of baby carrots per person, sliced into quarters
1/2 pound broccoli florets, I used frozen
1 cup of cherry tomatoes, cut into halves

1 red bell pepper, sliced into slivers
1 medium-sized Vidalia onion, small dice
Handful of your homegrown alfalfa sprouts

Method:
8-24 hours prior to cooking, drain the tofu, and pat it dry. Get as much water out as possible, so that it can soak up the marinade.

Cut the tofu into 1 inch cubes.
In a zip-top bag, throw in the tofu cubes, the fresh ginger, garlic, spices, soy sauce, rice vinegar, and broth. Make sure the tofu is well-coated.
Park this in the refrigerator to marinate.

When you are ready to cook, chop all your veggies up and have them ready to go.
The stir-fry technique requires fast cooking, so, there is no time to cook while you prep the rest of your stuff.
In a HOT, large sautee pan or wok, place a tablespoon of olive or sesame oil. Throw in your veggies. Keep them moving every 20 seconds or so in the hot pan for about 5 minutes. You want the veggies still crisp in the center, but soft and slightly caramelized on the outside.
Evacuate the finished veggies to a clean bowl.

Return your pan to the VERY HOT burner to heat up again.
Add another tablespoon of olive or sesame oil.
Put in your tofu, but reserve the marinade.
Toss the tofu until the edges are caramelized, about 5 minutes, it's ok if it sticks to the pan a little. Evacuate the cooked tofu to the bowl with the veggies.

"Deglaze" the hot pan with the tofu marinade. Let it reduce if there's too much liquid. Then quickly add your tofu + veggies back in and toss. This will coat everything and get the little tasty bits off the bottom of the pan.
Allow to cool slightly, then serve with rice or ramen noodles.

Then....right before serving, put a sprinkling of the alfalfa sprouts right on top for extra crunch. It also makes it look pretty and fresh!

Now that I've made you hungry, I will gross you out. Next step in this "indoor gardening" project....convincing Doug that we can have a worm box!

Tuesday, August 23, 2011

Dupont Circle Sunday morning

August 23, 2011


Moving to northern Virginia (to the neighborhood of Rosslyn in Arlington, to be exact) has gone very smoothly over the last couple of weeks. Things have been fun and very interesting so far. For example, the writing of this blog this afternoon was interrupted by a 5.9 magnitude earthquake in Northern Virginia, and by the urge to go swimming instead of being inside. After all, our building was still standing, so, we went to the pool.

Sunday was a great adventure, as I rode the circulator bus to and from the Dupont Circle Farmer's Market. This market is held year-round and is usually very crowded in the summer-time. I was excited to ride the bus for the first time in D.C., especially since it took me from Rosslyn through Georgetown.

As a small history and geography lesson, the neighborhood Doug and I are living in is southwest of the District of Columbia along the west bank of the Potomac River. Georgetown is a 15 minute walk north across the Key Bridge. Dupont Circle is a U.S. Historic District in the heart of D.C. Intersecting here are Connecticut Avenue, Massachusetts Avenue, New Hampshire Avenue, 19th Street and P Street. This area is dotted with beautiful architecture and is also "Embassy Row." The Polish Embassy is right off P Street!

Now back to the good part!

The Dupont Circle farmer's market is LARGE in comparison to the ones I've been to in Georgia, Florida, and South Carolina. The farmers and artisanal food-makers come from within 100 miles of Dupont Circle: West Virginia, Virginia, Maryland, Pennsylvania, Delaware. I got to taste apples from West Virginia, blueberries from Pennsylvania, and mushrooms from Virginia. You know you're in a good farmer's market when you get to taste almost everything that is available for sale. Who needs breakfast? You will be stuffed by the time you leave!

I walked around the market a few times looking at what's available. What interested me the most was the sheep's milk cheeses. This niche sheep farm, Everona Dairy, is about 60 miles north of Richmond, and has been making cheese for 13 years. Their signature cheese, the Everona Piedmont, is a nutty hard cheese that reminds me of Romano.

Have you ever had a sheep's milk cheese? Many of you have, I'm sure, and you may not even know it. Sheep's milk cheeses tend to be less "stinky" than their goat counterparts. High-end Italian pecorino romano is made from sheep's milk, as are many types of feta. My favorite sheep's milk cheese is Halloumi, or the "grilling cheese." This Middle Eastern cheese has a ridiculously high melting point, and is often served after grilling or pan-searing with a little bit of olive oil and lemon. I've found it at Shaherazad's in Starkville, MS, at Whole Foods, and even at the Fresh Market on Hilton Head.

At Dupont Circle, I also found some good local mushrooms. They had cremini, portobello, button, oyster and trumpet mushrooms plucked from the earth the previous evening. I decided to put them to good use in a Wholefoods.com inspired side dish last night.

Quinoa with mushrooms and Brussels sprouts
Ingredients:
1 cup quinoa
1 pound mushrooms (I used local cremini, I hear chanterelles are nice in this), sliced
3 cups low-sodium chicken broth or stock (veggie broth is great too)
tablespoon unsalted butter
tablespoon olive oil
medium sized Vidalia onion, small dice or 2-3 shallots, small dice
1 clove of garlic, minced
1 pound of Brussels sprouts, rinsed and cut in half
salt and pepper to taste
Method:
In a large pan or cast iron skillet, heat on medium-high heat the olive oil. Cook your onion until slightly browned on the edges, then remove from the pan and set aside.
Add a little more olive oil to your hot pan and add in the Brussels sprouts. Cook on medium-high heat for 8-10 minutes, or until slightly tender. Add your garlic in during the last 2 minutes of cooking, taking care not to burn it!

While you do this, put your quinoa and 2 cups of broth into a quart pan and bring to a boil. Once boiling, cover and allow to simmer on low until the liquid is absorbed. Or just follow the directions on the bag of quinoa.

Remove the Brussels sprouts when they are tender, set aside with the onions, and put the mushrooms in on medium-high. You want the pan to be a little hot so the mushrooms will caramelize and let off their moisture. Once they start to get tender, add a small amount of salt and pepper, and the butter. Once tender, remove from the pan.

Deglaze the pan with the 1 cup of broth that's left. Then, add in your cooked quinoa. Stir in the cooked mushrooms, Brussels sprouts, and onions. Stir to combine. If it's a little soupy, cook on low for a few minutes, but I doubt you'll need to.
Enjoy as a vegetarian main course or a side dish.


Tuesday, August 9, 2011

Eating into the Wild: The Pacific Northwest

August 10, 2011

Doug and I just finished a fantastic trip to the Pacific Northwest and back to the Southeast again. We are currently still in Gainesville, Georgia! After you humor me by looking at some travel pictures,
I will end this blog posting with a useful recipe on how to cook your own goose. :)

The series of photographs will take you through Dahlonega, Georgia, where my ancestors went to "strike it rich" to Doug's home in Seattle, Washington and Coeur D'Alene, Idaho. Our trip was littered with excellent food and beer, from cuisine from the banks of the Danube
to wild game.

Enjoy!


Many thanks to my cousin Andy Morris, who shot this goose for us this past fall in South Carolina. I enjoyed roasting and eating it in celebration of Doug's return from deployment in Japan.
A classic side dish of "duck fat potatoes" with rosemary and fleur de sel
Up, up, up! 3 miles to the top of Mt. Fremont in Mt. Rainier National Park

At 7,500 feet
A very cold but beautiful snow-melt lake


On our way home from Coeur D'Alene, Idaho, we drove through Wenatchee, WA and got some awesome cherries!
Bear sausage chili, thanks to my brother and sister-in-law, Matt and Cas Rowe in Idaho!
Elk for lunch at the Coeur D'Alene arts festival down by the lake


Downtown Seattle with Mt. Rainier in the distance, as seen from the Space Needle

Wind turbines in "wind farms" dot the countryside in Eastern Washington....I think that they improve the landscape and are interesting to look at. There were hundreds!

Enjoying "local" beers at a tavern in Coeur D'Alene, Idaho

Craving a 6 mile hike in thin air yet? Better fuel up with a delicious roasted goose!

You can have your cousin shoot one in the wild for you, dress it, and put it in a freezer-ready bag, or, buy one down at the local megamart or Whole Foods.
This recipe will change if you use a commercially grown goose, as they have much more fat in their skin than the wild-flying and constantly exercising variety.
Our goose did not have it's skin on it, as this made it easier to prepare for the freezer.

Juniper roasted Goose
yes, I did make up this recipe!
yes, you need to start 72 hours in advance!
yes, it's WORTH IT!

Steps to success:
Buy a 5-10 pound goose. Too much bird? Buy a smaller duck....this same recipe works!
Day 1: Thaw out your goose....be mindful, this may take more than overnight.
Discard the packet of giblets/neck or save for making "poultry stock"

Day 2: Once thawed, place your bird on a paper towel lined sheet pan or plate, and pat the skin dry with paper towels.
Then, sprinkle kosher salt liberally onto the skin of the goose.
Let the bird sit in the fridge for 24-48 hours to "air-cure"
This may sound gross, but it is ESSENTIAL for drying out the fat under the skin, and the salt will pull out more moisture.
Dry skin + oven heat = crispy, delicious skin!
Change the paper under the bird every 12 hours or so since bacteria might like it.

Day 3: Say hi to your goose. Change it's paper.

Day 4: The day of roasting!
Pre-heat your oven to 350 F
Pull goose out of the fridge, allow to warm for an hour or so
Wipe off the skin with paper towels to get off excess salt and moisture.
Pepper the skin and cavity liberally
Place sprigs of rosemary, parsley, onion slices, and juniper berries into the cavity
Place the goose breast side up on a roasting pan and tie the legs behind her for even cooking
Make sure your roasting pan has slits in it, to let the fat drip away from the bird. This is very important!
Every 40 minutes or so, baste the bird with the drippings.
Roast your 10 pound farm raised bird at 350 F for 3 hours, or until internal temp is 180 F.
Let the bird rest when done for 15 minutes before carving. Discard what's in the cavity.
mmmmm.....crispy, crispy skin.

IF YOUR GOOSE DOES NOT HAVE ANY SKIN ON IT, OR IS A WILD GOOSE WITH SKIN: FOLLOW THESE INSTRUCTIONS.
A few changes have been made to ensure moist, delicious meat! This is what we did, and it turned out great!
After thawing your goose:
Prepare your brine solution for the goose (see instructions below)
Brine the bird in the refrigerator at least 8 hours
Pre-heat your oven to 350 F
Pull goose out of the brine, pat dry with paper towels
Salt and pepper the skin and cavity liberally
Place sprigs of rosemary, parsley, onion slices, and juniper berries into the cavity
Place the goose breast side up on a roasting pan and tie the legs behind her for even cooking.
Apply 6-8 slices of bacon over the breast of the goose. This will help to "baste" the goose as it cooks, and prevent the meat from drying out too much.
We like applewood smoked or Thompson Farms Hickory smoked
Make sure your roasting pan has slits in it, to let the fat drip away from the bird and onto your potatoes!
Baste this bird every half hour or so.
For our 4-5 pound wild goose, we cooked her at 350 F for 1.5 hours, or until the internal temp of the meat was 180 degrees.
The skin-on versions are much, much better, but this was awesome as well, and you have bacon at the end too.

The Brine
(Inspired by Alton Brown)
Into a LARGE plastic bowl or tub:
1 cup kosher salt
1/2 cup light brown sugar, packed
1 tablespoon black peppercorns
3 large sprigs of rosemary
1 tablespoon of juniper berries
2 bay leaves
1 gallon of water
Submerge your skinless goose (or skin-on wild goose) into this solution for 8-24 hours prior to cooking.
Stash goose and container in your refrigerator. Yes it takes up a lot of space!
If you brine your goose, it cuts down on total time. No "air-curing" for brined birds!

Lazy Goose Fat Potatoes

This is super easy if you have one of those roasting pans that came with your oven, ya know, the one with slits on the top part, and the pan underneath.

So, before you put the goose in the oven:
Slice 2 pounds of russet potatoes into 1/4 inch slices and put them in the bottom of the pan.
Put the rack with the goose on it on top
Roast with the goose, allowing the fat to drop onto the potatoes for 1 hour.
In the last 30 minutes of cooking, put a tablespoon of finely chopped rosemary and 3 cloves of garlic (peeled, whole) into the potatoes and stir them up in the pan.
Baste the goose at this point.....there should be PLENTY of fat.
After the 1 hour, remove the potatoes from the pan (carefully!) and put the pan back under the goose.
When you remove the potatoes, you may want to put the goose temporarily on a cookie sheet in the oven to continue cooking, or have another pan ready to transfer and catch the drippings. Just trade out the bottom pans.
This way you don't lose cooking time, oven temperature, etc.

Set the potatoes aside, salt to taste while hot (this is a great application for that fleur de sel that you've been saving), and enjoy with your goose!

Thursday, July 14, 2011

The dog days of summer

July 17, 2011


Danger is just exhausted from taking care of Mommy all by himself for the last 6 months! Hang in there little buddy, Daddy comes home tomorrow!

Here we are again in the July "dog days of summer," the days when it's so hot that you want to do nothing more than what the dogs do....lay around and try to stay cool.
I've been staying cool and busy with cooking up the final week's allotment from Rest Park Farm CSA, canning, and drying tomatoes! I have decided that canning and drying is more practical, since we will have to box everything up for our move to the District in the next couple of weeks. Frozen tomatoes and eggplant might not like 11 hours in a cooler!


While I have delicious fresh produce still on hand, I have been busy making new dishes. The two that have been stand-outs lately have been my grape tomato bruschetta and grilled eggplant frittata.


Bruschetta is just Italian toast. The really authentic stuff is grilled and then the cut edge of a raw garlic clove is rubbed all over the hot bread...the original garlic bread. My version is very hearty and I've made it a meal several times.
You may notice in the picture above that there is a toast that is not like the others. This was my "dessert" bruschetta...homemade fig preserves from my neighbor and black sage honey on toast, with grated Parmesan cheese on top. I broiled it until the cheese was melted and browned. It was really good, the sweet and salty really work well together!

Ingredients:
A hearty bread that you like, sliced: baguette, rye, multi-grain, etc.
Extra virgin olive oil
Fresh mozzarella and Parmesan cheese
2 cups of fresh grape or cherry tomatoes, sliced in half
1 small garlic clove, minced
1/2 a green bell pepper, fine dice
1/2 of a medium Vidalia or red onion, fine dice
5-6 large fresh basil leaves, chopped
salt and pepper to taste
pinch of red pepper flake or cayenne pepper powder

Method:
Place a tablespoon of olive oil into a pan. Sautee your onion and bell pepper over medium-high heat until the onions are translucent. Add the halved tomatoes, garlic, salt and pepper, red pepper flake. Cook down the tomatoes and veggies until you can really smoosh those tomatoes with your spoon, and their juices go everywhere. At this stage, add the basil, and cook on medium for another 2-3 minutes. It should be starting to look like a chunky marinara sauce. If it's still to watery, reduce it down more until it is thick.
Toast your bread slices under a broiler or on a grill. Once toasted, add your chunky smooshed tomato mixture on top, and top with sliced mozzarella cheese and Parmesan cheese, if you have it on hand.
Place your loaded toasts directly under your broiler on high. Broil until the cheese is melted and slightly browned, 1-2 minutes.
Enjoy with a glass of wine! Simple, but delicious.

Now on to the second Italian inspired summer recipe of the day. The frittata! I think Julia Child once said that the preparation of Italian food is not really cooking....because it is so simple and easy! I like it! Here is the must-knows about the frittata:
- A frittata is really just a quiche without the crust. Don't tell the men!
- You can make it with whatever you have on hand, almost like a "leftover casserole."
- The main ingredient you MUST have are eggs. These bind all the other ingredients together like a glue.
- They are delicious hot or at room temperature.
- They are portable. Almost like a pizza slice....eat it in the car, at the table, or at the beach!
Grilled Eggplant Frittata
Ingredients:
1/2 large eggplant, grilled. I used the leftover eggplant that wouldn't fit into the eggplant parmesan pan.
6 large eggs
1/4 cup of half-and-half, whole milk, or skim milk....whatever you have on hand.
tablespoon of butter
tablespoon of olive oil
2 oz. fontina cheese, grated
2 oz. goat cheese, crumbled
handful of fresh parsley and basil, chopped
2 cloves of garlic, minced
2 red potatoes, skin on, sliced very very thin
1/2 of a small red or vidalia onion, diced
handful of cherry or grape tomatoes, sliced in half.
salt and pepper to taste

Method: Pre-heat your oven to 400 F.
In a non-stick, oven safe pan, like a well seasoned cast iron skillet, melt the butter over medium-high heat. Add the olive oil. Add your potatoes and onions, and cook until the potatoes are browned and soft. Add the salt and pepper to taste. While those are cooking, whisk the 6 eggs with the milk in a mixing bowl and set aside. When the potatoes and onions are done, add the herbs and garlic, and cook for 1-2 minutes. Lower your burner to low, and add in the egg mixture to your veggies. Let it set, don't stir. Add your fontina cheese directly on top of the egg mixture. Then, layer your eggplant on top of the fontina, and press it gently into the egg mixture. Add your tomatoes on top of that, and the goat cheese.
Cook on medium-low on the stovetop for 3-5 minutes. The mixture will bubble. After this time, transfer to your 400 F oven, and cook for 15-20 minutes, until the mixture is slightly "jiggly" in the middle.
Let the frittata "rest" for 5 minutes after you take it out of the oven before cutting into it. You can turn it out onto a serving tray, with the browned side up, or, serve out of the pan like I did. YUM! EASY!

Next time.....saying goodbye to Beaufort and the Lowcountry. :( The next chapter of the Lowcountry foodie will soon be coming to you from northern Virginia!

Tuesday, July 5, 2011

All-American Celebration


July 4, 2011

After a whirl-wind weekend of spending time with family, blackberry cobbler and amphibious Jeeps...I have settled late this evening at my favorite privacy spot along the Beaufort River. This spot has free wifi and a view of the river that is unmatched. I may pass along this secret spot to a deserving friend before my time is done here in Beaufort. ;-)

My inspirational theme this weekend has been seen in a celebration of summer, the constitutional republic that we live in and adore....and of course.....the backyard BBQ.

In the South, when we speak of BBQ, we speak of pork that has been slow smoked on hickory, pulled and slathered in sauce. Most Americans (ahem....Yankees) call grilling "BBQ-ing". There is no humanly way you can "BBQ" a hot dog or hamburger....but let's leave the details to Alton Brown.

Here in the Great State of South Carolina, most people have fired up their charcoal or gas grills in pursuit of delicious beefy or porky goodness this weekend. Let's not forget the elemental side dish of fresh cut watermelon, potato chips, and.....corn on the cob.

Corn! It's so elemental, most people don't realize it's importance in the establishment of the United States of America. Before 1607, when England sailed the open sea, for Glory, God, Gold, and the Virginia Company, the Native Americans were celebrating their freedom with maize, a staple crop precursor to what we know as corn.

The ancient Mesoamericans would most likely be disgusted (or yet delighted?) to see what we have done with modern corn. After all, it was the Mayans and Aztec ancestors that began to cultivate maize some 10,000 years ago. It was essential to human life systems in times of old, and continues to have a large impact on our socio-economic health today.

To see more, read at the Economist.com: The Beef About Corn, etc.

Politics aside, I LOVE CORN! :)

After a leisurely swim with the 1943 Ford GPA at my parent's lake this weekend, we enjoyed some delicious fresh grilled corn-on-the-cob in our bathing suits, under a gorgeous azul north Georgia afternoon sky. This was nice, but not completely practical for year-round satisfaction, as fresh corn is quickly perishable and only attained at it's peak in the summer. I find myself wanting it in the winter, where it can only be obtained from the depths of my freezer in sub-par condition.

I have received copious amounts of this same sweet corn in my CSA box for the last couple of weeks here in Beaufort. What to do with the excess besides give it away? This is not dent corn #2 that I can store in a silo and transport to Poland a year from now. I've had to get creative.

I have learned to use a form of corn cake that will please both the gourmet and the redneck palate. Delicate herbs will envelop your senses, but the grilling method makes it accessible to any backyard cook. These cakes can be made in advance and frozen very well!
These are so good! I have done them with just parmesan cheese and with the smoked mozzarella. I find that if you grill them or fry them, you need to add an egg to this recipe for extra binding power. Excellent!

Serve with a little creme fraiche at your next dinner party, or as a side dish. If making them to grill up in winter-time, wrap each cake in plastic film, and store in a zip-top bag in your deep freeze. Allow to thaw slightly before grilling or frying.

Corn has always been a staple of the American diet, don't let it die! Have pride in your native foodstuffs! Don't get bored with it, as most people do. It's not all about jalapeno cornbread studded with corn kernels out of a can (still sounds good though....), give some fresh corn a try this summer either on the grill or in a new dish! Start up your Google people....and get cooking!

Thursday, June 23, 2011

Food Politics: Who is your farmer?


June 23, 2011

Food politics have been interesting to me for a few years now. It all started when I asked a friend, Jackie, why she just bought local organic foodstuffs. Jackie has several children and grandchildren, and has been an organic gardener for 20+ years. She and her husband, Dale (a retired chemist) live on a 300 acre cattle and horse farm in Gainesville, GA.

I always thought that she just bought organic because they had lots of money to spend, or because she had some political problem with "big business." As I have spent the last decade processing her knowledge of all things local, free-range, and organic, I realize that what I thought of her purchase choices are partially true. But....there is so much more to it than that!

Some of us buy local because we want our monies to go directly to the hard working farmers, and cut out the "middle-man". That "middle-man" is often a large distributing company or multi-national corporation, like Cargill. I understand that the people in the corporations need to make a living too, but I've found through personal experience that nothing is better than giving your farmer the full share of money that he or she deserves.

There are two local farms here in Beaufort that I go to directly for a lot of my food, and a couple of local fishermen. I have blogged about them many times before, but here they are again with their websites:
Bradley Seafood--on St. Helena Island, so small they don't have a website. They have one boat!

The most rewarding experience I have had buying my food from local producers has been with the Rest Park CSA. They are a family farm of 20 acres near Ehrhardt, South Carolina. Since I live in the "Bible Belt", I will take the immortal words of Jesus--"love thy neighbor"--and very happily show that love to my farmer in the form of dollar bills. I promise I am not doing this to be all "self righteous" and snub those who aren't a member of a CSA. I'm just trying to give credit where credit is due.

Most of us want our dollars staying locally nowadays, right? Seeking out local farmers and CSAs is a great way to do this. Some of the most economically depressed areas in South Carolina are losing their productive farmland because they are too small to compete with the larger "factory farms" and because the locals just want to buy everything from Wal-Mart.

The problem behind why so many of America's small farms are disappearing is very complex, and I'm not going to get into it in this blog. The things you can do to help preserve the small family farmer is to:

1. Educate yourself! Stop at the road-side stands, talk to people in your town who have lived there a while. Check out your options online!
2. Buy local! You will not be disappointed, the freshness is unmatched, and it'll make you feel good about your actions as well.
3. Educate others. Invite your neighbors over for dinner and tell them about where you picked the figs that are in the dessert.
4. Promote the education of our children....especially in rural America. America's brightest youth need to realize that there can be important, interesting and fulfilling careers in rural agriculture.

I love the fact that the West family knows me by name, and I get to see their smiling faces every Wednesday afternoon. I know that they have been working their tails off all season long, and through their exhaustion, I see the satisfaction in their smiles. Despite the hard work, it is worth it to them. They care about their product, their customer, and each other. Almost every time I pick up my CSA box, I learn something new about vegetables. This week's CSA box was the most abundant yet: TWO 25-pound watermelons!, 2 cantaloupes, italian eggplant, grape tomatoes, new potatoes, spaghetti squash, sweet corn, cucumber, jalapenos, bell peppers, and fresh rosemary sprigs. I hope to stop by their farm over the 4th of July weekend on my way home to Gainesville, to see their labor of love in vivo.

Another farm that I support, White Oak Pastures, in Bluffton, GA, has an incredible family legacy. I'm inspired by the daughters of Georgia grass-fed beef farmer, Will Harris III, who all went to Valdosta State to major in business and advertising, and went home to grow their family enterprise. This is how we keep bright minds in rural areas, growing our food and making sure it's done right. I would love to be involved with producers like this as a veterinarian.

If you are interested in the politics of food, check out these links. These are great resources for educating yourself on both sides of the issues: organic, local, and fair-trade.

Which was made into a movie in 2008 called "Food, Inc."


It does not matter what side of the argument you're on...pro vs anti-organic, or fair-trade, one thing that The Economist fails to criticize from an economic standpoint is....buying local is an economically sound idea!

Saturday, June 18, 2011

Lazy Summer Weekends


June 18, 2011

Today is Saturday, and I am just messing around the house and garden. It rained a little bit overnight, thank God....it has been so dry here! My water bill appreciates me not having to water the veggies as much.

Since the short thunderstorm last night, today's high is only 91, instead of 97. But that's OK, I have good ways to use the sun, which I'll get to later.

I think I have found the best way to have lunch on a lazy, hot Saturday or Sunday afternoon. Not only is it healthy, but it celebrates the best of the season here. My tomato plants are giving me several ripe tomatoes each day, and I put them to good use.

Doug and I like to eat hummus, so we usually have a Tupperware full of it in our fridge most days. I would like to "publish" my favorite recipe below for you all to try, and use for your own healthy summer lunch. I find ours is better in the summer, since the herbs are fresh:

Simple Slightly Spicy Hummus
Ingredients:
1 cup of dry garbanzo beans, also called "chickpeas"
- We like to use dry, since the canned tend to have a lot of salt added to them, even if you drain them....as I learned from Cooking Light magazine. So....soak your dry beans overnight in water, then drain, and cook in 2 cups of water stovetop for 45 minutes.
- My lazy way: 9 PM the night before, put your 1 cup dried beans and 2 cups water into the Crockpot on low setting. Add a pinch of sea salt as well. In the morning, your beans will be ready to go in hummus or a salad. Drain the water well before using.

5-10 sprigs of fresh parsley
2-5 large leaves of basil
2 tablespoons of tahini, be sure you mix it well....the oil likes to separate
pinch of sea salt
pinch of black pepper
1-2 pinches of kung pao or cayenne pepper, Thanks Uncle Don for your home-grown kung pao pepper flake that I used in mine yesterday!
1/4 cup of extra virgin olive oil (California), or add until it's nice and creamy
2 garlic cloves
1 teaspoon of lemon or lime juice

Method:
Using your food processor (fastest, and easiest), put in your herbs, garlic cloves, and tahini and pulse until your garlic is in tiny bits.
Then, add the remainder of the ingredients, except the oilve oil.
Once everything is combined but has a bit of a "dry paste" consistency, drizzle in the olive oil until creamy and smooth.
Remove from processor bowl into a Tupperware or into your mouth.
~This keeps in the fridge for 7-8 days easy, ours never lasts this long.

Today I enjoyed my homemade hummus with homemade flatbread, garden fresh heirloom tomato, cucumber, olive oil and balsamic vinegar for dipping. I topped it off with a refreshing tiny glass of limoncello.
*My flatbread is really just pizza dough that I made last night when I put the beans in the Crockpot. I let it proof overnight in the fridge, then put into the oven right before lunch today. EASY! It's so much tastier than store-bought, you can control the amount of salt, make it whole-grain or organic, and it does not take that much time! I have used the Anson Mills recipe with White Lily bread flour in the same proportions of yeast, water and salt, and its incredible.
I think this lunch is a great way to celebrate healthy eating and celebrating the bounty of summer. I've watched a few recent episodes of Jaime Oliver's Food Revolution on abc, and I think he would approve. My Mom has been making tomato, mozzarella and fresh basil paninis lately, which sounds delicious! I'll have to try that soon with my flatbread!

This evening with my dinner, I want to enjoy another "fruit of the sun"......my Charleston Tea Plantation Peach Tea. Any good Southern cook or "lady" knows that in the summer, you make sun tea! It is so easy and helps keep your kitchen cool. One less stove burner to turn on.
It is simple, simple, simple.

Sun Tea
NOTE: I use loose tea whenever possible, and strain it after brewing.
I use 1 teaspoon of loose tea per cup of water, and it is just the right strength.

Take your tea bags or loose tea, and put in a mason jar or other container with a lid.
Use the same number of tea bags per cup of water, like you usually do.
Fill container with appropriate amount of water.
Put the lid on the container.
Put it in direct sun for 1-2 hours. You want the water to look like tea, and the container to be VERY warm, before you bring it in.
If you want to sweeten your tea, I recommend using a simple syrup or adding agave nectar, as it will dissolve better than granulated sugar.
Chill, pour over ice, and enjoy!

Making Sun Tea is so easy....das Jetta can do it!

Like I've said before.....this blog needs a food stylist! Please laugh at my pictures, it's ok! :)

Friday, June 10, 2011

Ratatouille

June 11, 2011

It's June in the Lowcountry, and the veggies are going crazy! I am now getting cucumbers, squash, sweet onions, eggplant, green and yellow peppers, jalapeƱos, and sweet corn in my CSA box! The tomatoes are another 1-2 weeks away from being ready at Rest Park Farm.

I've gotten several grape tomatoes and heirloom tomatoes out of my own garden in the last couple of days. Back during the first week of March, I took a chance on the weather and planted my tomato seeds into the ground. At the end of March, I bought larger plants and put them in. Those are now bearing ripe fruit, and there are green tomatoes on the plants that came from seed.
All of the squash, onions, and eggplant have been going into Ratatouille lately. Ratatouille is a French peasant vegetable stew, usually made with squash, zucchini, bell pepper, eggplant, carrot, onion, garlic, and fresh herbs. The most traditional herbs are thyme, basil, marjoram and bay leaf. Ratatouille is also an Academy Award-winning Pixar movie about a rat in a Parisian kitchen.....and is just as good as it's namesake dish!

I have been making 2 big batches a week, and have tried different flavor combinations. Sometimes I add cayenne pepper flake, and other times I add roasted garlic and a light dusting of Parmesan cheese on top before letting it broil to a golden brown.

My favorite way to make Ratatouille is very simple, rustic, and downright lazy.

Oven-roasted ratatouille (makes 4-6 LARGE servings)
Ingredients:
3-4 zucchini, each about 6-8 inches long (phallic monsters, as my aunt likes to call them...heehee)
3-4 small crook-neck or "pattipan" yellow squash
1 large eggplant, rough dice
1 green bell pepper, diced
2-3 large tomatoes, diced
2 carrots, rough dice
1 medium Vidalia or other sweet onion, rough dice
2 cloves of garlic, minced
handful of fresh basil, chopped
small sprig of rosemary, chopped
Two "pinches" of dried oregano
2 tablespoons of extra virgin olive oil
Two "pinches" of dried chili flake, you can omit this if you're not into spicy
1/2 teaspoon salt, 1/2 teaspoon black ground pepper, or to taste

Method:
Preheat your oven to 350 F.
-Dice your veggies into somewhat uniform size
-mince the garlic and the herbs
- place all ingredients into a large mixing bowl
- take your clean hands and mix everything together
- transfer to a large casserole dish
- bake for 30-40 minutes
DELICIOUS! Let this bake while you take a shower, brush the dog, or prepare faster cooking components of your meal.

I like ratatouille on its own for a healthy lunch, or as a side dish with grilled chicken, tempeh or sausage. YUM!!!

I have a feeling that someday I will be feeding my kids ratatouille while they watch ratatouille!